


I found a nice DIY (Do It Yourself) video tutorial, how can you make your own cheap Button Box at ReadySetGame's Youtube channel, here. Thanks for the guide!
You should watch the video first to understand the whole process.
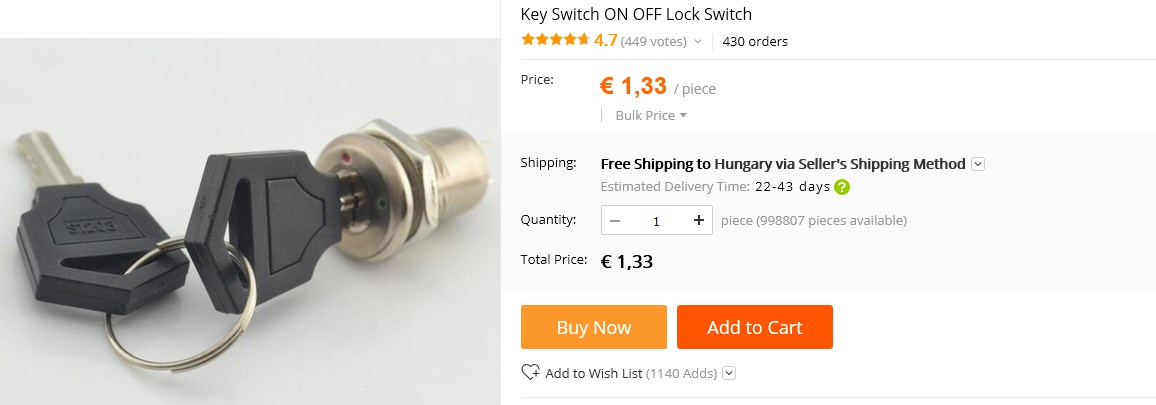
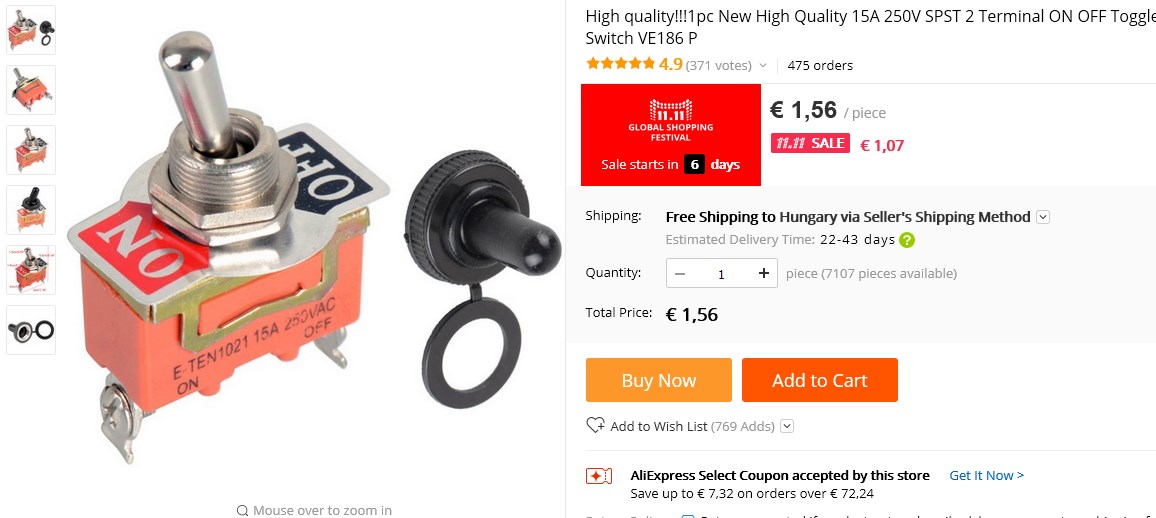
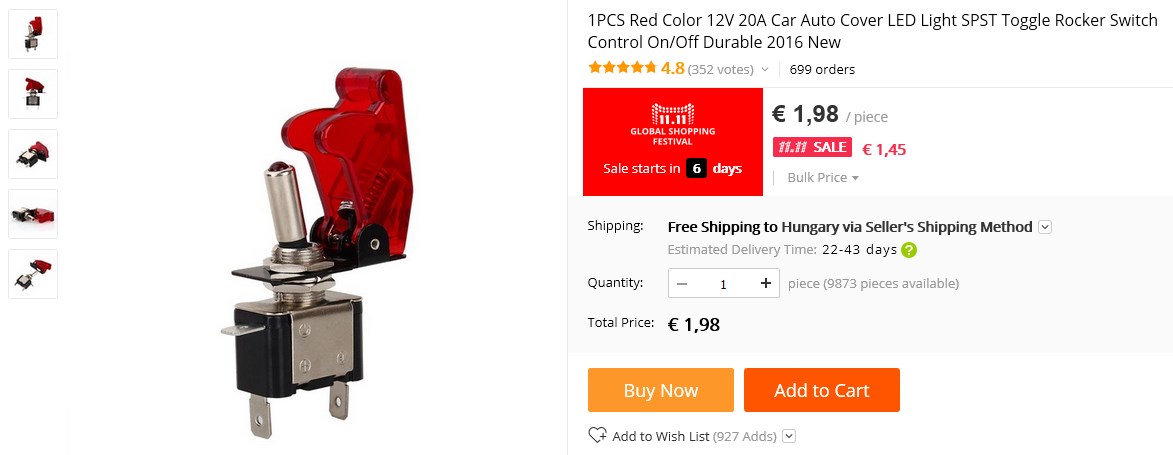
I ordered all the parts from Aliexpress, where you can find cheap buttons, switches and the required Zero Delay USB. Total amount of Cost less than 28 EUR.

What you need to make your own Button Box - those items are optional:
(Click on the titles to open their link in a new windows)

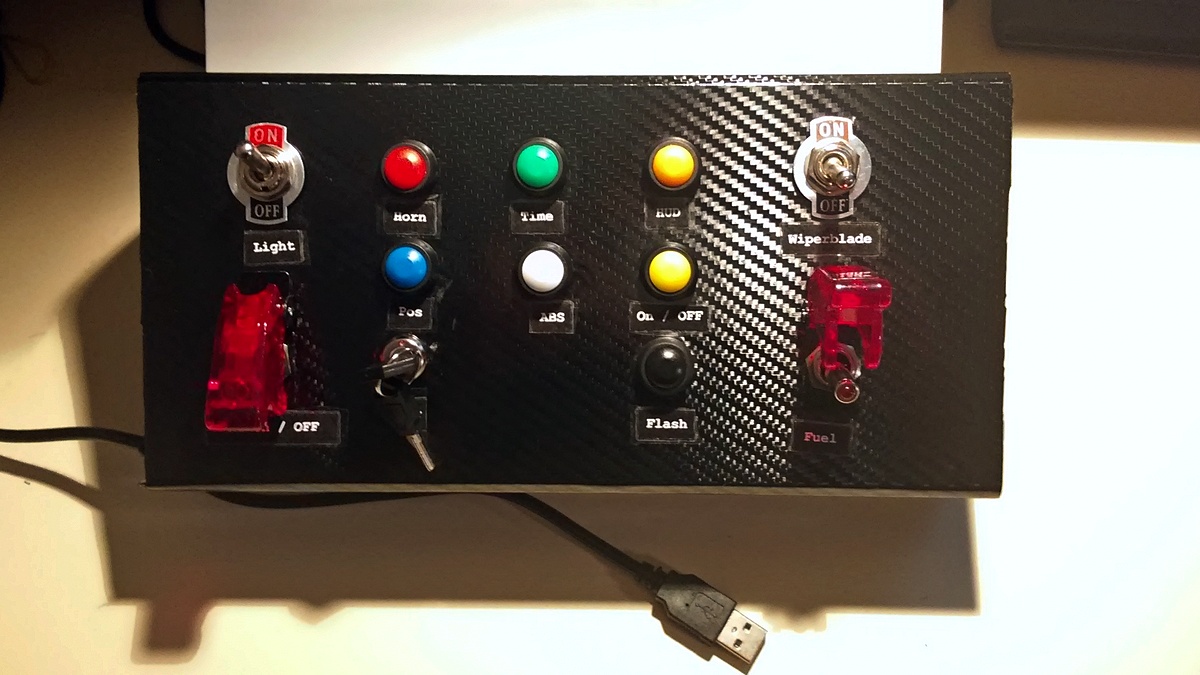
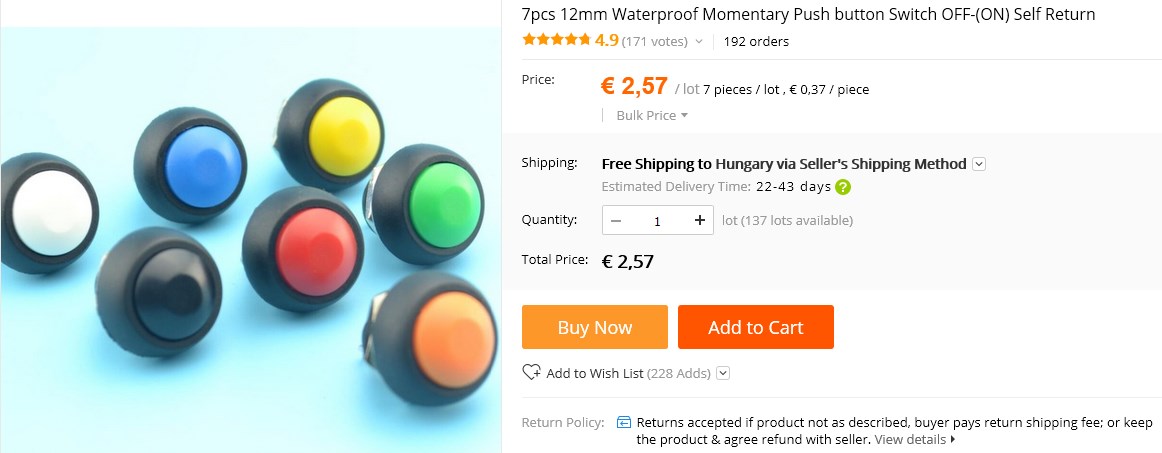
7 pieces of 12mm Momentary Push Button (you have to solder wires because of the small connector legs )
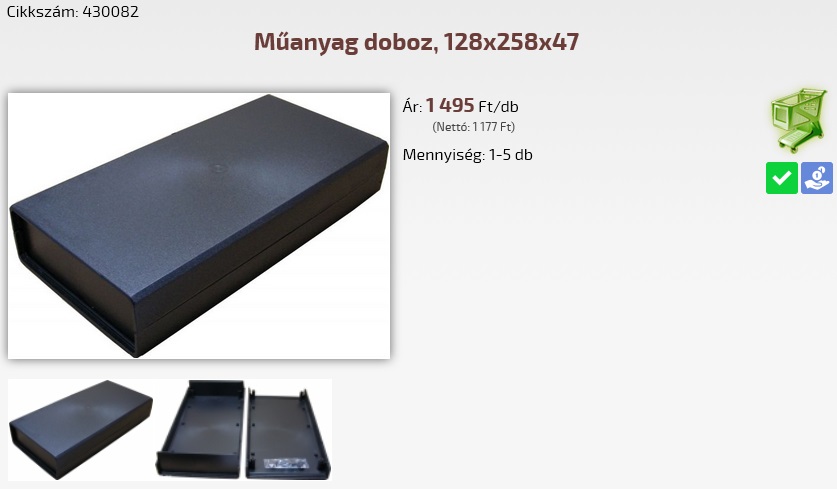
1 piece of Plastic Electronic Project Box (i bought at a local electronic shop)
Dimesnions: 128 mm x 258 mm x 47 mm
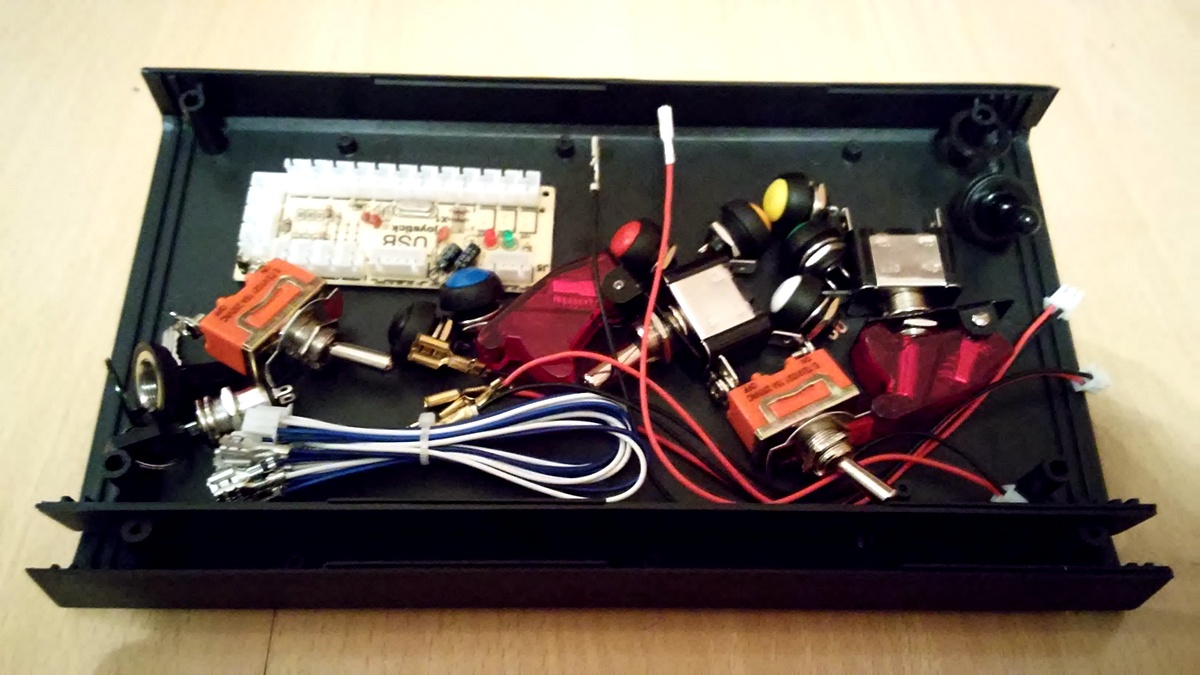
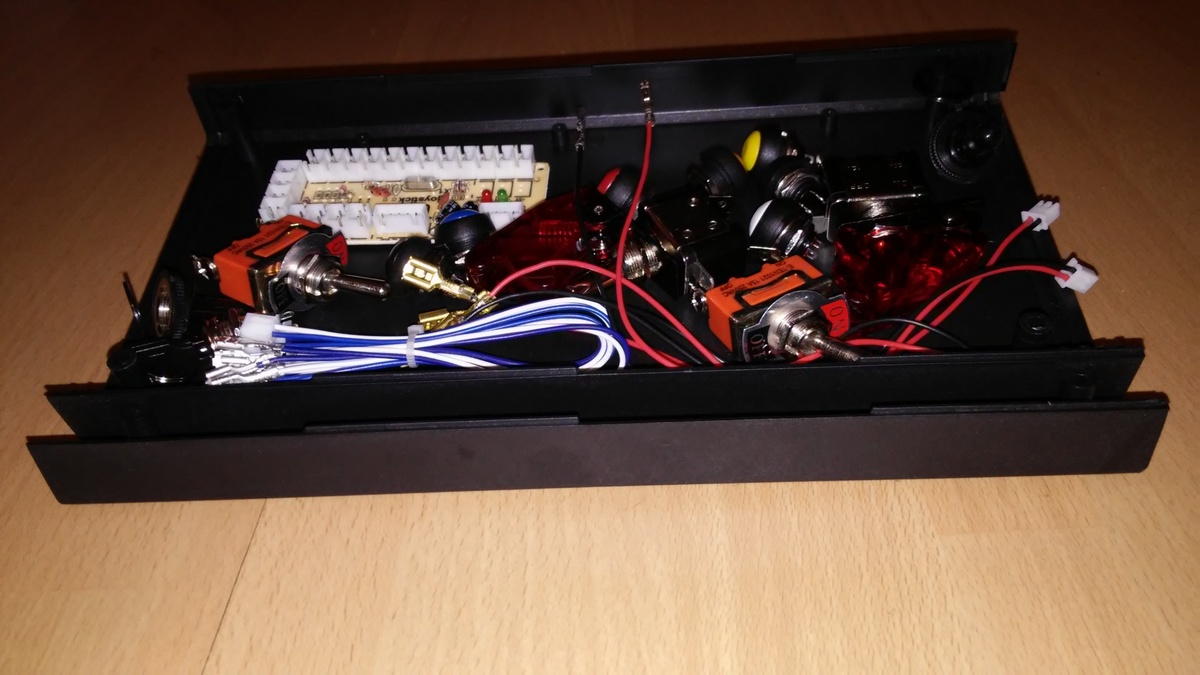
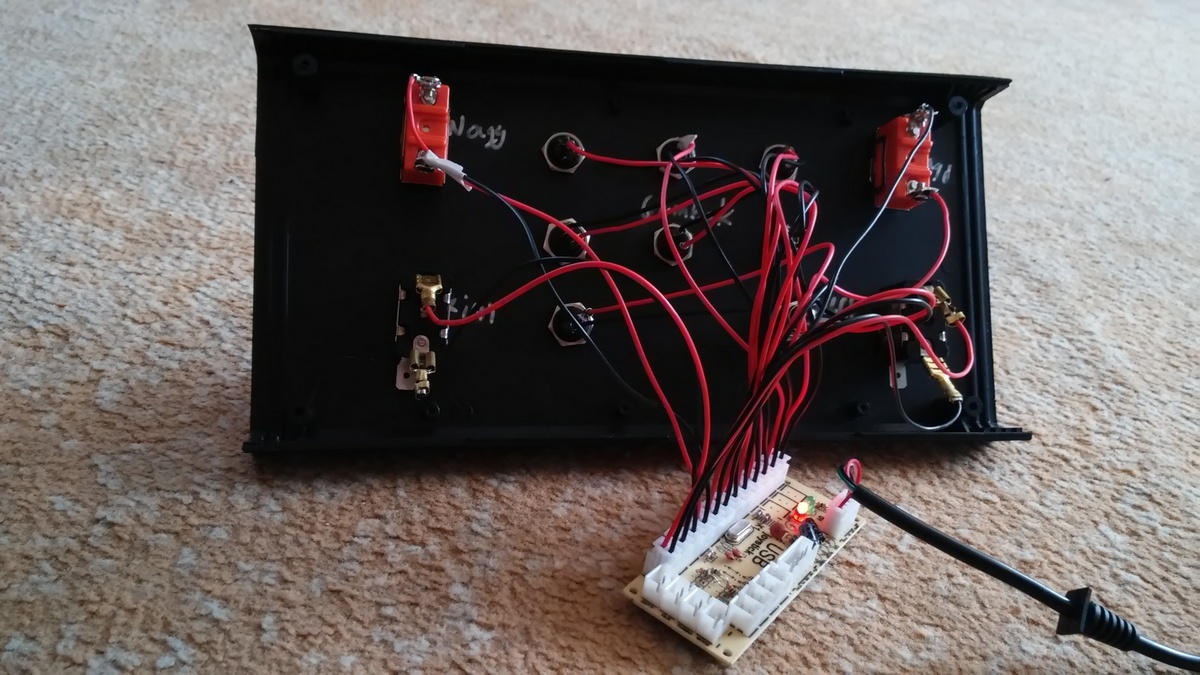
First of all, solder wires where you have to do in case of some buttons, most of all you don't have to do, because the Zero Delay USB Encoder kit contains all the required cables, as the USB plug-in cable too, and the cables has got connectors.
Then you should imagine the layout of your switches, then drill the holes onto the plastic Project box.
I used Glue gun to place the Encoder onto the back of the Project box, after i connected all the wires to the right places (instruction manual has included in the Encoder's pack).
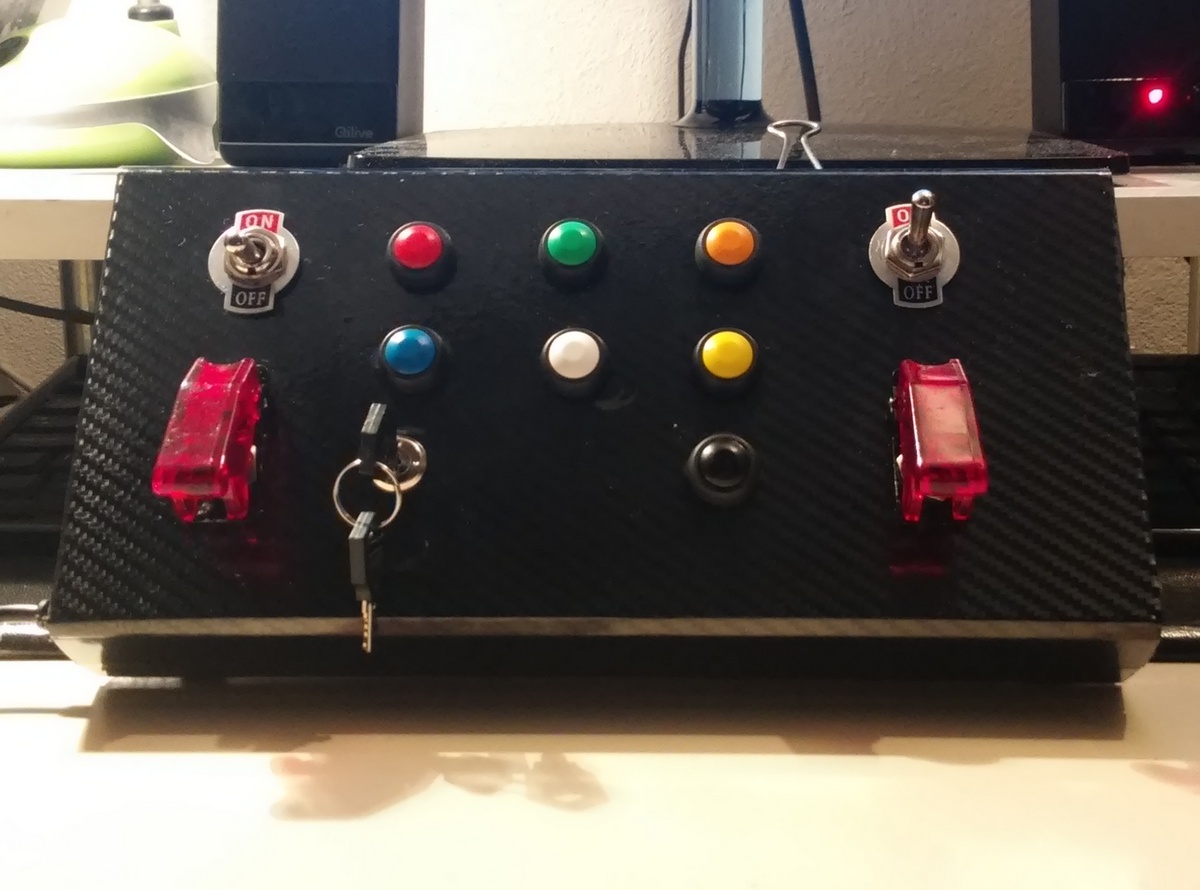
I covered the top of the Project box with Glossy Carbon Fiber Film Wrap to look like a real carbon button box. You don't need much the same amount of film, i used them elsewhere too.
You can use your button box for games as Project Cars, Assetto Corsa, Eurotruck Simulator 2, American Truck Simulator, Rfactor 2, Indycar, Automobilista etc. Windows recognise your device as Generic Gamepad.
